Change settings easily by using the Polar ProTrainer 5 software. For further information, consult software help.
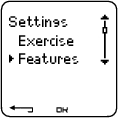
↑ Back to topSelect Settings > Features.
Activate the GPS function by selecting Settings > Features > GPS > On. Teach new sensor? is displayed.
If your sensor is already taught, select No.
If your sensor has not been taught yet, see 11. Using a New Accessory for more information on teaching.
*Optional sensor required.
The cycling computer measures and displays altitude. Change the settings of the altimeter in the Altitude menu. You can calibrate the altimeter manually or automatically.
Calibrating the Altitude Manually
Select Settings > Features > Altitude > Calibrate > set the altitude of current location
If the altitude of your location differs significantly from the displayed altitude value Calibrate to xx? is displayed.
Yes: Altitude calibrated to xx is displayed.
No: Altitude calibration canceled is displayed.
Calibrate the altitude to ensure it remains accurate. Set the reference altitude whenever a reliable reference, such as a peak or a topographic map, is available or when at sea level.
Calibrating the Altitude Automatically
Select Settings > Features > Altitude > AutoCalib > On / Off
By using the altitude Automatic Calibration option, you can adjust the starting elevation to be set always the same in the beginning of the exercise. Calibrate the elevation manually and turn the Automatic Calibration (AutoCalib) on. From now on, this elevation will be always used as the base elevation in the beginning or the exercise, when automatic altitude calibration is in use. Also, if the Automatic Calibration is turned on and you calibrate the cycling computer manually, this new value will be used as a new starting elevation for the Automatic Calibration option.
If the elevation or air pressure changes significantly, you are prompted to confirm the change. If you change the elevation,Altitude calibrated to xx m/ft indicates that calibration has succeeded. If Altitude calibration failed is displayed, re-calibrate the altitude.
You can also set the elevation for the Automatic Calibration also by using the Polar ProTrainer 5 software. For more information see software help.
Select this option if you train in the same environment. This way, altitude values are always correct.
If the sport profile of the exercise includes automatic calibration, altitude measurement always begins at this elevation regardless of the general elevation settings.
The cycling computer records the training data in 5 second intervals by default. You can set a new recording rate in Settings > Features > Rec.rate > 1 / 2 / 5 / 15 / 60 sec.
The cycling computer can store your heart rate, speed, cadence, power and altitude in 1, 2, 5, 15 or 60 second intervals. A longer interval gives you more recording time, while a shorter interval allows you to record more heart and other data. This enables accurate data analysis using the Polar ProTrainer 5 software.
A shorter recording rate consumes the memory of the cycling computer more rapidly. The remaining recording time is displayed on the lower row when setting the rate. Default recording rate is 5 seconds.
When less than 30 minutes of maximum recording time is left, the recording rate changes automatically to longer recording time (1s > 2s > 5s > 15s > 60s). This will maximize recoding time to record exercise data. When the session ends, the current recording rate will be used in the next training session.
The following table shows the maximum recording times for each recording rate. The maximum recording time can be shorter, if you record a large number of short exercises.
Recording rate will change when less than 30 minutes of recording time is left. Memory low is displayed 60 minutes before the memory runs out.
| RR Data | Speed | Cadence | Power | GPS | Recording rate | ||||
|---|---|---|---|---|---|---|---|---|---|
1s | 2s | 5s | 15s | 60s | |||||
Off | Off | Off | Off | Off | 22h 30min | 45h 00min | 112h 40min | 338h 10min | 1352h 55min |
Off | Off | Off | On | Off | 9h 30min | 19h 10 min | 48h 10min | 144h 50min | 579h 40min |
Off | Off | On | Off | Off | 16h 50min | 33h 40min | 84h 30min | 253h 40min | 1014h 40min |
Off | Off | On | On | Off | 8h 20min | 16h 50min | 42h 10min | 126h 50min | 507h 20min |
Off | On | Off | Off | Off | 11h 10min | 22h 30min | 56h 20min | 144h 50min | 579h 40min |
Off | On | Off | Off | On | 4h 40min | 9h 30min | 24h 00min | 67h 30min | 270h 30min |
Off | On | Off | On | Off | 6h 40min | 13h 30min | 33h 40min | 92h 10min | 368h 50min |
Off | On | Off | On | On | 3h 40min | 7h 30min | 18h 40min | 53h 20min | 213h 30min |
Off | On | On | Off | Off | 9h 30min | 19h 10min | 48h 10min | 126h 50min | 507h 20 min |
Off | On | On | Off | On | 4h 30 min | 9h 00 min | 22h 30min | 63h 20min | 253h 40min |
Off | On | On | On | Off | 6h 00min | 12h 10min | 30h 40min | 84h 30min | 338h 10min |
Off | On | On | On | On | 3h 30min | 7h 00min | 17h 40min | 50h 40min | 202h 50min |
On | Off | Off | Off | Off | 18h 20min | 25h 20min | 32h 40min | 37h 30min | 39h 50min |
On | Off | Off | On | Off | 8h 40min | 14h 20min | 23h 30min | 32h 40min | 38h 20min |
On | Off | On | Off | Off | 14h 20min | 21h 20min | 29h 50min | 36h 10min | 39h 20min |
On | Off | On | On | Off | 7h 40min | 13h 00min | 22h 00min | 31h 40min | 38h 00min |
On | On | Off | Off | Off | 10h 00 min | 16h 10 min | 25h 20min | 32h 40min | 38h 20min |
On | On | Off | Off | On | 4h 30min | 8h 10min | 15h 50min | 26h 00min | 35h 40min |
On | On | Off | On | Off | 6h 20min | 10h 50min | 19h 30min | 29h 00min | 36h 50min |
On | On | Off | On | On | 3h 30min | 6h 30min | 13h 20min | 23h 30min | 34h 20min |
On | On | On | Off | Off | 8h 40min | 14h 20min | 23h 30min | 31h 40min | 38h 00min |
On | On | On | Off | On | 4h 10min | 7h 40min | 15h 00min | 25h 20min | 35h 10min |
On | On | On | On | Off | 5h 40min | 10h 00min | 18h 20min | 28h 10min | 36h 30min |
On | On | On | On | On | 3h 20min | 6h 20min | 12h 50min | 23h 00min | 34h 00min |
Durations in the table are estimates. For RR data, maximum recording time depends on heart rate and variation of heart rate. If you record laps and/or create an exercise that includes phases with the Polar ProTrainer 5 software, maximum recording time will decrease.
Select Settings > Features > RR data > On / Off
The RR data recording function measures and records heartbeat intervals with one millisecond resolution. This enables the analysis of heart rate variability (HRV) using the Polar ProTrainer 5 software. The RR data function consumes the memory of the cycling computer and when setting the function, the remaining recording time is shown on the lower row of the display.
Set the automatic lap recording
Select Settings > Features > A.Lap > On > set the lap distance
The cycling computer will automatically record laps. Choose Off to deactivate.
Choose a format to view your heart rate
Select Settings > Features > HR view > HR / HR% / HRR%
Define Polar Sport Zones in the cycling computer
Select Settings > Features > Sport zones > Sport zone low limit
Set the lower limit of sport zone 1 by pressing or . Then press . Set the lower limits of each sport zone in the same way. When setting the lower limit, the upper limit of the previous zone is set automatically.
Press and hold to switch between sport zone views: HR% (percentage of maximum heart rate) or BPM (beats per minute) or HRR% (percentage of heart rate reserve).
You can change settings easily by using the Polar ProTrainer 5 software. For further information, consult software help.
You can lock/unlock sport zone by pressing and holding the button during your ride.
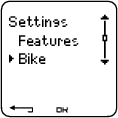
Select Settings > Bike
You can set three bike preferences for the cycling computer. Prepare the settings for the bikes and when you start training, select bike 1, 2 or 3. Bike 1 is set as a default.
Select Settings > Bike > Bike 1, Bike 2, Bike 3 or Other. Bike 2 and Bike 3 can be turned on or off. Select Other to deactivate speed, cadence and power sensors, and to measure only heart rate, altitude, temperature and data provided by the GPS sensor.
Select Bike > Bike 1 > Wheel
Wheel size settings are a prerequisite for correct cycling information. For more information on measuring the wheel size, see Measuring Wheel Size.
As default the speed is Off for bike 1.
To activate the speed sensor in your cycling computer, select Settings > Bike > Bike 1 > Speed > On. Teach new sensor? is displayed.
If your sensor is already taught, select No.
If your sensor has not been taught yet, see 11. Using a New Accessory for more information on teaching.
Speed settings are either done manually or with the Polar ProTrainer 5 software.
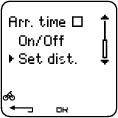
Select Settings > Bike > Bike 1 > Arr. time
Set the distance you are going to ride, and the cycling computer will calculate and display the estimated time of arrival based on cycling speed. Install the Polar Speed Sensor on your bike to measure speed and distance. For further information on installing the speed sensor, consult Polar Speed Sensor user manual.
| |
|
Select Settings > Bike > Bike1 > Autostrt
The Autostart function starts or stops automatically the exercise recording when you start or stop cycling. The Autostart function requires Polar Speed Sensor W.I.N.D.
You can install an optional power sensor onto your bicycle.
To activate the power sensor in your cycling computer, select Settings > Bike > Bike 1 > Power > On. Teach new sensor? is displayed.
If your sensor is already taught, select No.
If your sensor has not been taught yet, see 11. Using a New Accessory for more information on teaching.
Power settings: You need to enter the chain weight (g), chain length (mm) and span length (mm) into the cycling computer to measure correct power information.
If you use the Polar LOOK Kéo Power system, follow the instructions below:
Select Settings > Bike > Bike1, Bike 2 or Bike 3 > Power > Settings and
> Set chain weight 304 g > OK
> Set chain length 1473 mm > OK
> Set span length 420 mm > OK
For the Polar LOOK Kéo Power system to work properly, the cycling computer must use the default power settings. Even if you know the correct settings for your bike, do not use them.
If you use the Polar Power Output Sensor™ W.I.N.D., follow the instructions below:
Select Settings > Bike > Bike1, Bike 2 or Bike 3 > Power > Settings and
> Set chain weight in grams > OK
> Set chain length in millimeters > OK
> Set span length in millimeters > OK
Examples of chain weights and lengths (Due to the variation of the measurements, Polar cannot be held responsible for their validity): | ||
Weight | Length | |
Shimano Dura-Ace CN-7700 Super narrow HG | 280 g | 1473 mm |
Shimano Dura-Ace CN-7701 Ultegra CN-HG92, 105 HG72,105 HG73 | 280 g | 1473 mm |
Shimano Sora CN-HG50 | 335 g | 1473 mm |
Campagnolo Record 2000, 10 Speed Chain | 260 g | 1473 mm |
Campagnolo 10 Speed Chains Chorus, Centaur | 274 g | 1473 mm |
Campagnolo Veloce, Mirage, and Xenon | 277g | 1473 mm |
For precise readings, all settings must be as accurate as possible. Chain length and weight are directly proportionate to power value. If there is 1% error, the power value will also have 1% error.
There is no need to re-enter chain length and weight if links are removed. The system uses chain density (weight/length). Removing links from the chain does not affect density.
For further information on Power settings, consult the power sensor user manual.
Use Polar ProTrainer 5 software for Power settings.
*Optional sensor required.
You can install an optional Polar Cadence Sensor onto your bicycle.
To activate the cadence sensor in your cycling computer, select Settings > Bike > Bike 1 > Cadence > On. Teach new sensor? is displayed.
If your sensor is already taught, select No.
If your sensor has not been taught yet, see 11. Using a New Accessory for more information on teaching.
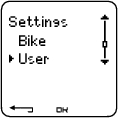
Enter accurate user information in the cycling computer to receive the correct feedback on your performance.
To set user information in the cycling computer, select Settings > User
Weight: To change units, press and hold
Height: To change units, press and hold
Birthday: dd=day, mm=month, yy=year
Sex: Male/Female
Activity: Top/High/Moderate/Low
Heart Rate: HRmax, HRsit
VO2max: Maximal oxygen intake
Activity Level
Activity level is an assessment of your level of long-term physical activity. Select the alternative that best describes the overall amount and intensity of your physical activity during the past three months.
Top: You participate in heavy physical exercise at least 5 times a week, or you exercise to improve performance for competitive purposes.
High: You participate at least 3 times a week in heavy physical exercise, e.g. you cycle 2-4 hours (40-120 km / 25-75 miles) per week or spend that time in comparable physical activity.
Moderate: You participate regularly in recreational sports, e.g. you cycle 1/2-2 hours (15-40 km / 3-25 miles) per week or spend that time in comparable physical activity, or your work requires modest physical activity.
Low: You do not participate regularly in recreational sport or heavy physical activity, e.g. you exercise hard enough to cause heavy breathing or perspiration only occasionally.
In the cycling computer, these values are used to calculate your energy expenditure.
HRmax (Maximum heart rate): Your age-predicted HRmax value (220 - age) is used as a default. Set your HRmax manually if your maximum heart rate has been determined in a lab, if you have performed the Fitness test with the Polar CS600X cycling computer, or if you have tested your maximum heart rate in the field yourself.
HRsit (Heart rate value in a sitting position): Your age-predicted HRsit value is used as a default. Set your HRsit value if you have determined it according to the instructions. For instructions, see Heart Rate Value in a Sitting Position in Background Information.
VO2max is your body’s maximum capacity for oxygen consumption during maximum exertion. The most accurate way of determining VO2max is to perform a maximal stress test in a laboratory. If you know your exact clinically-tested VO2max, set the value in the cycling computer. Otherwise, measure a comparable value, OwnIndex, by taking the Polar Fitness Test™. For further information, see Polar Fitness Test™.
If changes are made to the user settings, User settings updated is displayed.
You can enter and edit user settings by using the Polar ProTrainer 5 software. For further information, consult software help.
Select Settings > General > Sound > Volume > On / Off
Volume settings control button sounds and activity sounds during exercise. This does not affect the watch or target zone alarms (TZ Alarm).
You can set the TZ Alarm On/ Off:
Select Settings > General > Sound > TZ Alarm > On /Off
If the target zone alarm is deactivated, the heart rate reading will flash when you are outside the target zone.
To define keylock settings
Select Settings > General > Keylock > Manual / Automatic
Keylock prevents accidental button presses.
Manual: Activate the manual keylock.
Automatic: Keylock is activated in time mode when buttons have not been pressed for one minute.
To turn the keylock On/Off, press and hold the for at least a second and press .
Set preferred units in the cycling computer
Select Settings > General > Units > kg/cm/km or lb/ft/mi
Select language
Select Settings > General > Language > English / Deutsch / Español / Français / Italiano
Activate the sleep function
Select Settings > General > Sleep > Activate sleep mode? > Yes
Activating the sleep mode will help save the battery when the cycling computer is not in use for a long period of time. The watch alarm will still function in sleep mode.
To reawaken the cycling computer
Press any button > Turn display on? > Yes / No
Yes: the cycling computer is activated.
No: the cycling computer returns to sleep mode.
Set a reminder for different tasks or exercises
Select Settings > Watch > Reminders > Add new
Date: Enter the date of the task, dd=day, mm=month, yy=year.
Reminder time: Enter the time for the reminder.
Alarm: Set alarm to sound on time, or 10 min / 30 min / 1 hour prior to the task.
Sound: Select alarm sound Silent / Beep / Normal.
Repeat: Select reminder to repeat Once / Hourly / Daily / Weekly / Monthly / Yearly.
Exercise: Select an exercise to link to the reminder. When the reminder goes off, the cycling computer will present this exercise as default. Select NONE if you do not want to link the reminder to an exercise session.
Rename: To rename the reminder, select letters with or , and accept with .
You can program seven reminders in the cycling computer.
To see active reminders and modify them:
Select Settings > Watch > Reminders
Select a reminder to view, edit, rename or delete.
To set an event countdown in the cycling computer
Select Settings > Watch > Event
Event day: dd=day, mm=month.
Rename: To rename the event, select letters with or , and accept with .
To modify the event countdown
Select Settings > Watch > Event
You can view the event countdown, set a new date, rename or delete it.
In time mode, hide or view the event countdown again by pressing and holding .
Set an alarm on your cycling computer
Select Settings > Watch > Alarm > Off / Once / Mon-Fri / Daily
You can set the alarm to go off either once (Once), everyday between Monday and Friday (Mon-Fri), daily (Daily) or you can set if Off. The alarm sounds in all modes except in exercise mode, and will do so for a minute unless you press . The watch alarm also functions in sleep mode and even if you have turned the sound off in the General settings.
To snooze the alarm an extra 10 minutes, press or buttons or : Snooze is displayed and the snooze time starts counting. To exit the snooze alarm, press .
If a battery symbol appears in the display, the alarm cannot be activated.
Set time 1 in the cycling computer
Select Settings > Watch > Time 1 > 24h / 12h
Set time 2 in the cycling computer
Select Settings > Watch > Time 2
Set the desired time difference between time 1 and time 2 in hours with / buttons.
Switch between time zones
Select Settings > Watch > Time zone > Time 1 / Time 2
Select a time zone
In time mode, change the time zone by pressing and holding . Number 2 on the lower right corner of the display indicates that Time 2 is in use.
To set the date in the cycling computer
Select Settings > Watch > Date
dd=day, mm=month, yy=year
Change settings easily by using the Polar ProTrainer 5 software. For further information, see software help.
Some settings can be changed with a shortcut button in time mode.
Press and hold LIGHT > Quick menu
Keylock
Reminders
Alarm
Time zone
Sleep